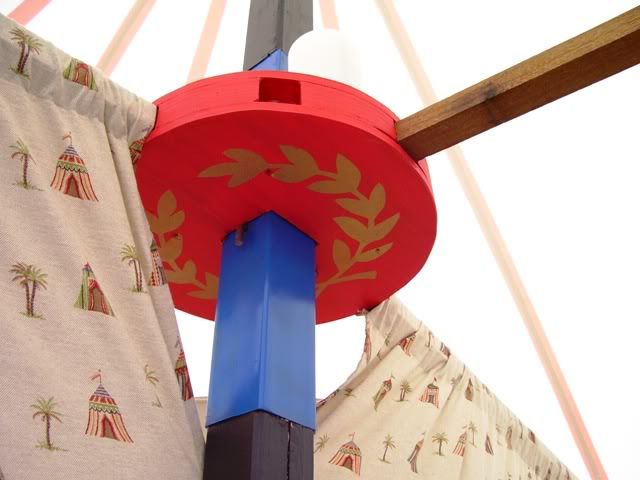
So I have been making a few spoked rounds recently and thought it was a good time to chronicle the process for making the hub that supports the spokes. This process seems to stump folks when they are considering this style of tent and it really isn't that hard.
 My first hub was made by gluing up 4 layers of 3/4" plywood and then drilling holes around the edge with a 1 1/4" spade bit. Using a hand drill made this especially interesting, but it worked and 9 years later I am still using that tent and the hub.
 3 years ago my friend Tristan and I made pavilions together. I made a round and oval and he made a round. He came up with a different method for making the hub. The process is similar, except when it comes to making the holes for the spokes. His method is a LOT easier.
I use 3/4" plywood and rip it down to squares approx 12.5" x 12.5", or just a bit over whatever size you want the diameter of your finished hub. The hub uses 4 layers of 3/4" plywood, giving it a finished thickness of 3". You really don't want a hub that is excessively large and a 12" diameter is perfectly fine for most tents.
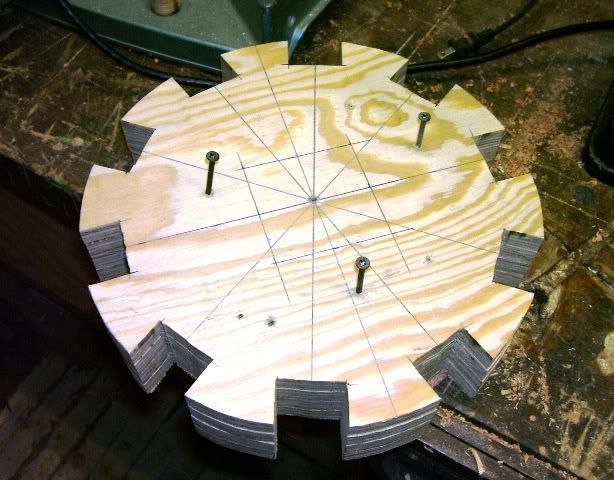
Stack the 4 layers of plywood together and mark the center and the size of the hole that you will cut for your center pole. It's easier to get this established before you cut the plywood into a circle.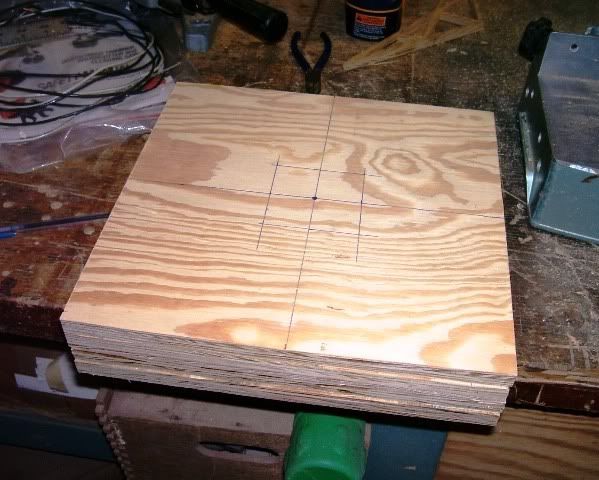

Next you draw out your circle and make a mark for each spoke. I used a paper template to determine the spoke location and make sure to line up the center carefully. This particular hub is for a 10 spoke round.
I'm lucky enough to have access to a large band saw so I used that to do the cutting. (Notice that I screwed the layers of plywood together so that everything would stay in place. I remove the screws when I am done.)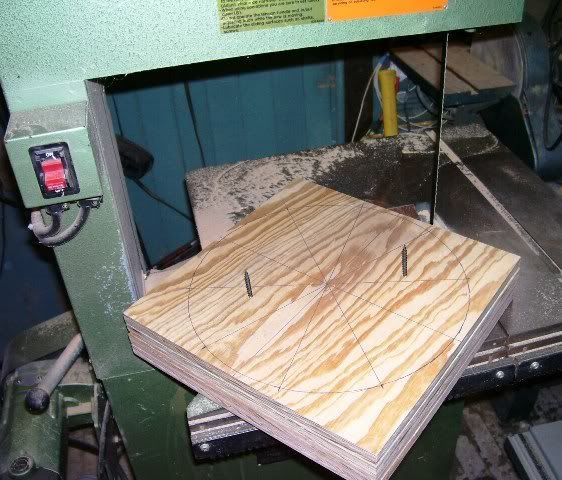

Next I extend the marks for the spokes to receive a 1.5" piece of wood. Using 3/4" plywood means that my holes will be roughly 1.5" x 1.5" square. Once the marks are drawn I cut this out on the band saw.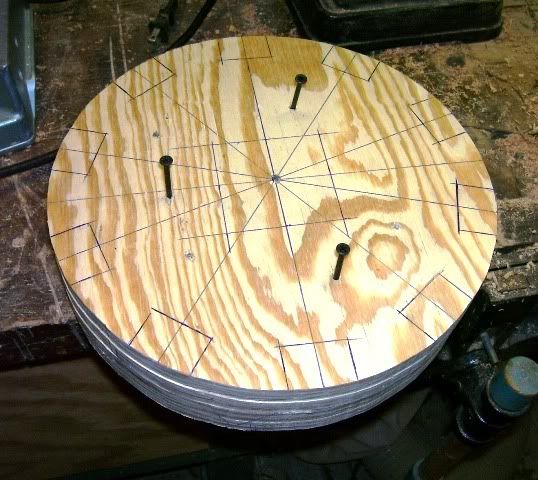
The finished piece will resemble a cog. When I took these pictures I was making 2 hubs, so this is why I am cutting out 4 layers of plywood with the notches. If you were making 1 hub, you would cut out only 2 layers with these marks. You use the remaining 2 disks to complete the hub, one on the top, one of the bottom.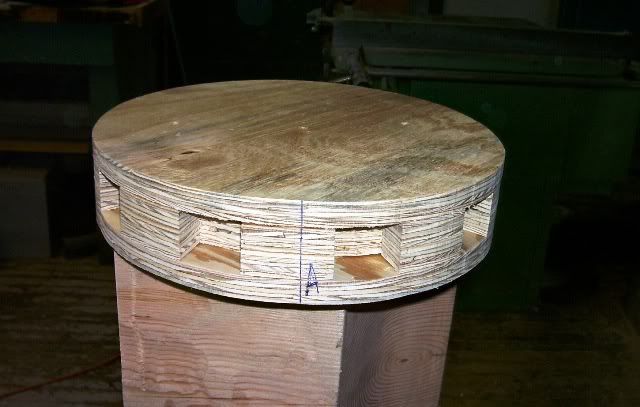
I use reference marks throughout the process to make sure that the disks line up. Since I was doing 2 separate hubs I marked them in different ways.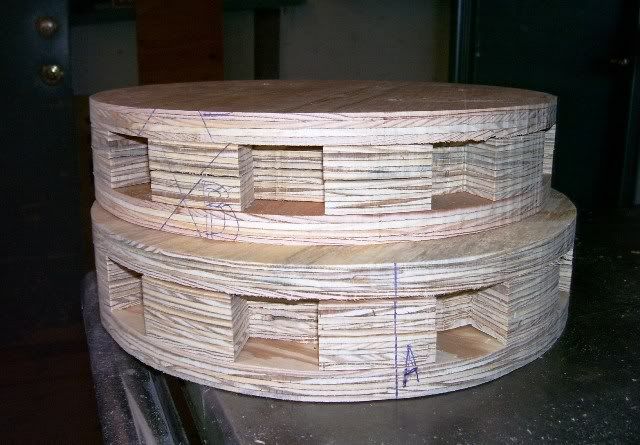
At this point I glue and screw the cog sections together and then I can clean up the cuts for the notches with a file or rasp. I want to cut out the hole for my center pole before I glue up all 4 layers of plywood. My jigsaw won't cut through 3" of plywood. Once the center hole is cut I can complete gluing and screwing the upper and lower disks of plywood in place.
Then I can sand and paint my finished hub.
No comments:
Post a Comment